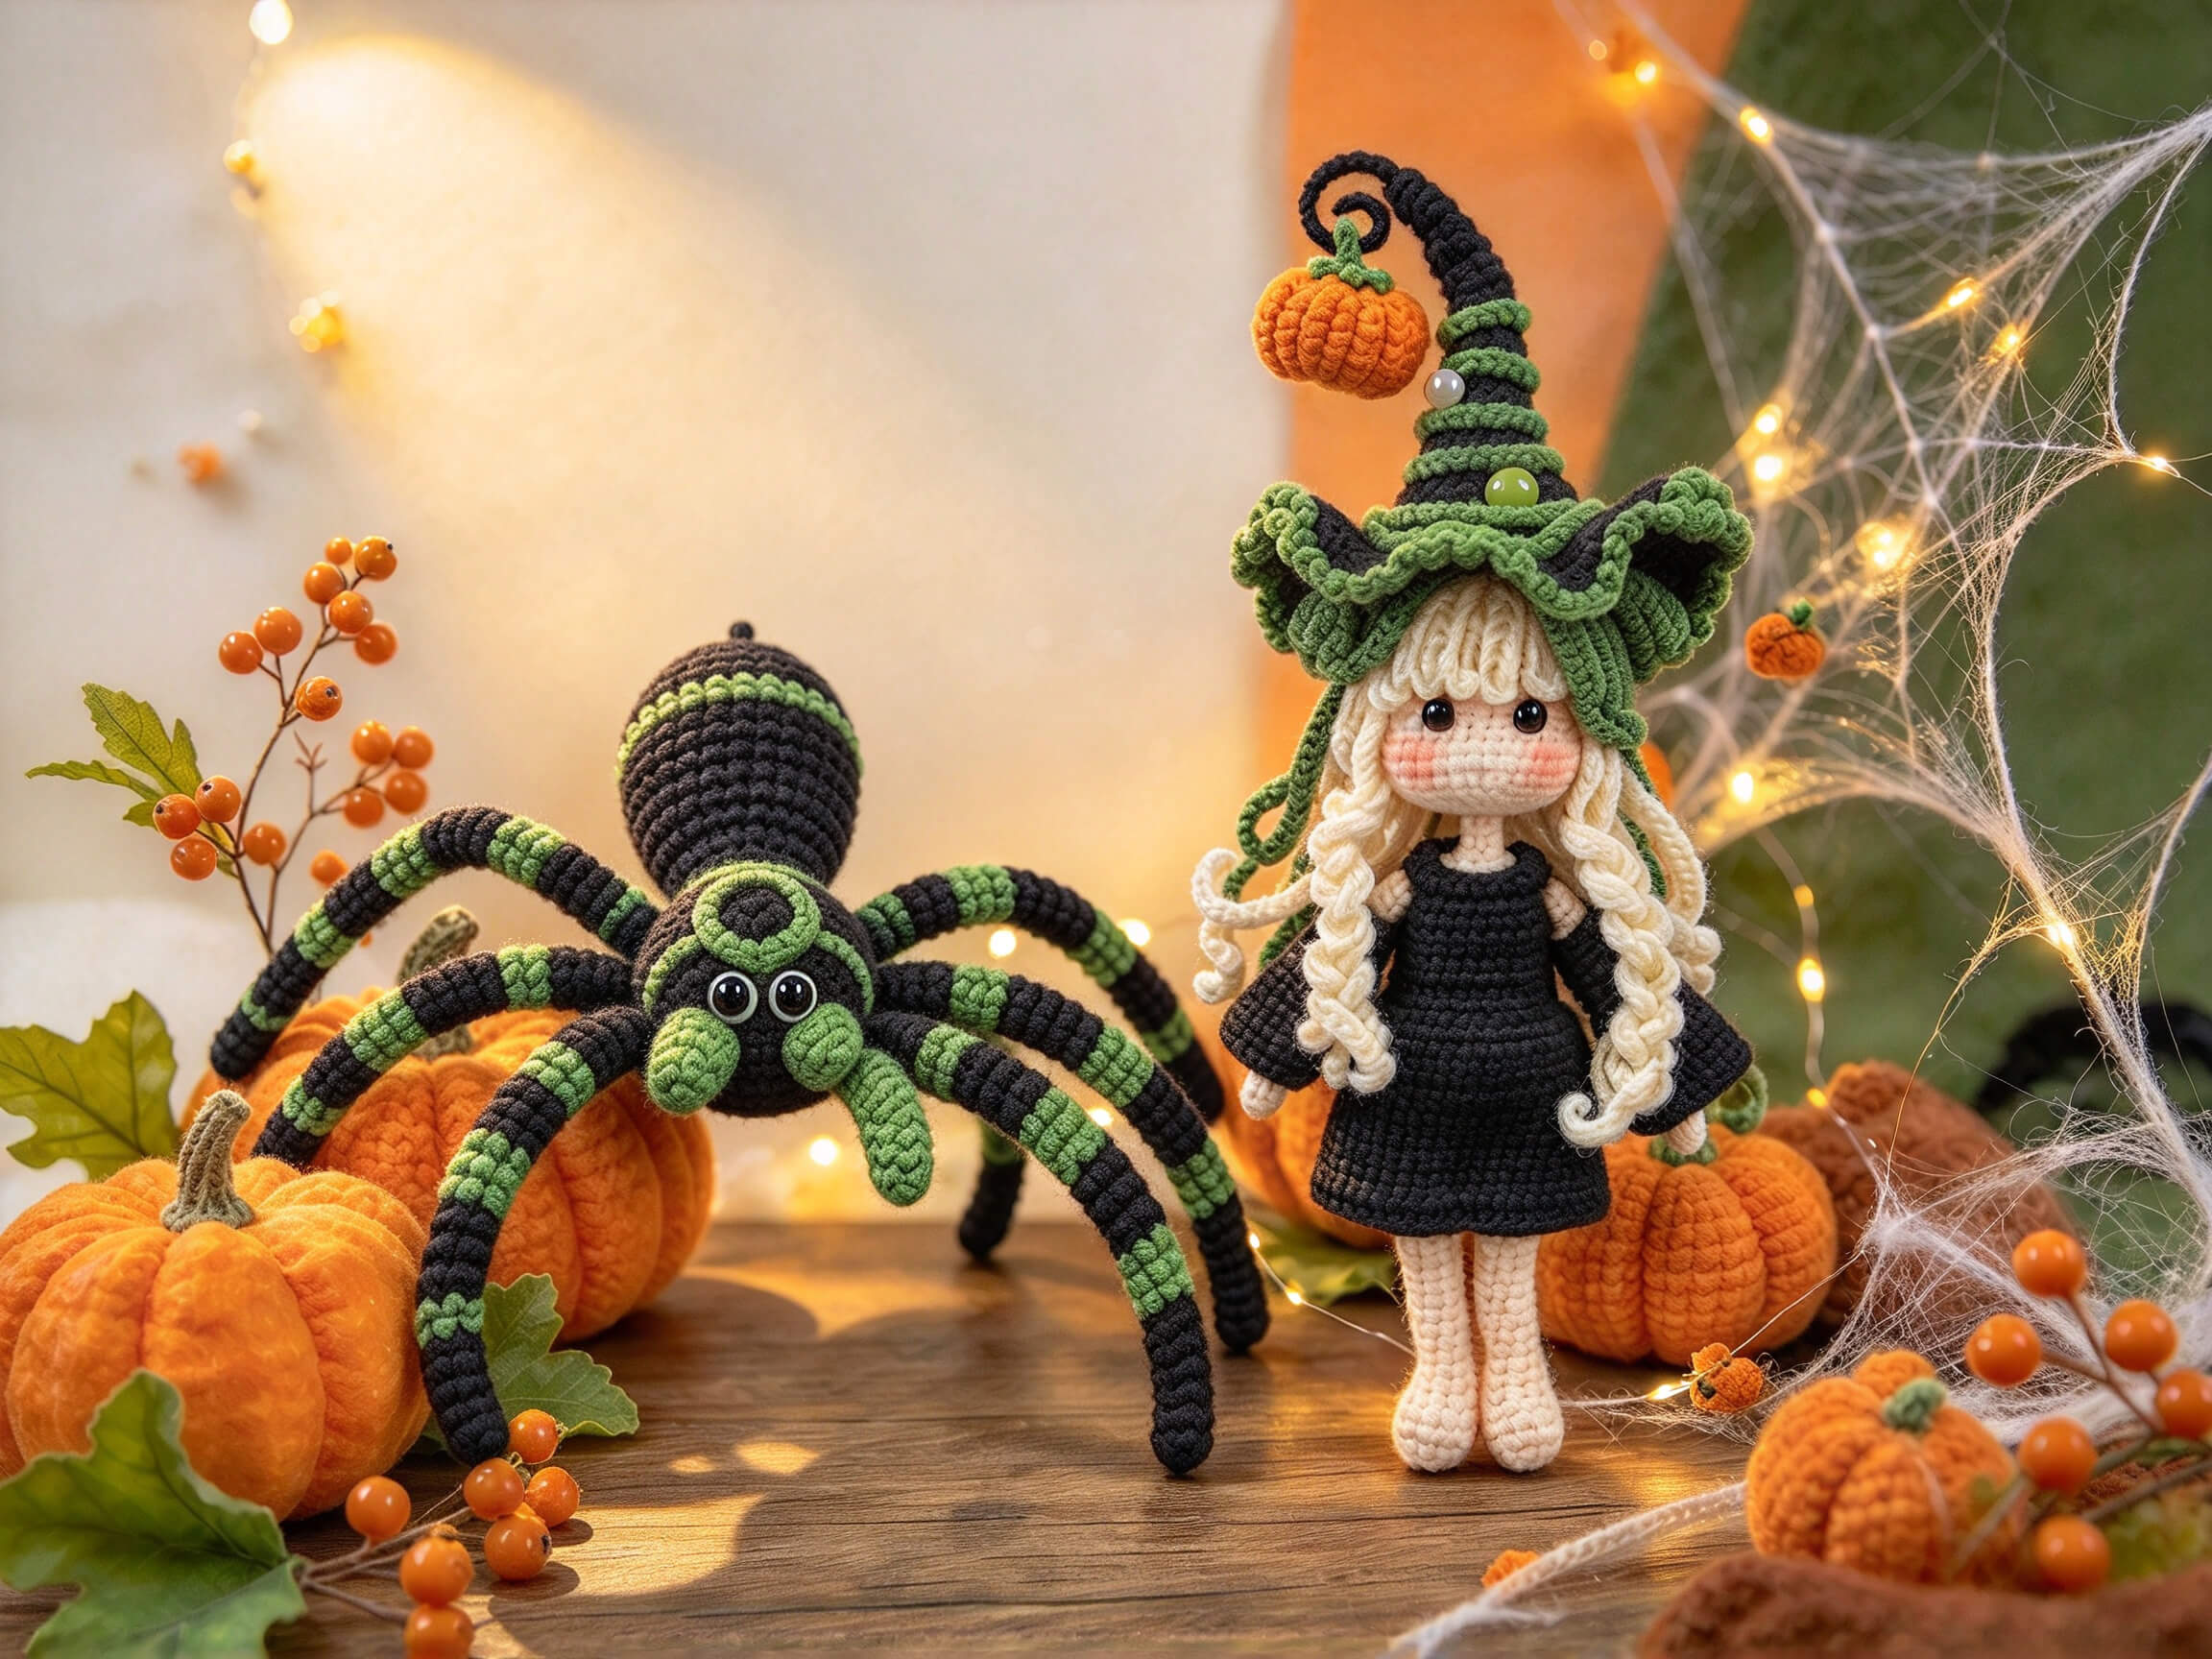
This Halloween crochet DIY creative doll with simple stitches is perfect for intermediate-beginner crocheters and works great as a delicate handmade gift. You only need a 0.7mm crochet hook, size 8 lace yarn to start this fun handmade project. The design uses basic, easy-to-operate crochet stitches without complicated tricky techniques. The finished creative doll stands approximately 14cm tall. Generally, it takes about 30 hours to finish the whole piece, while the actual time will differ according to your available time and individual crochet speed. It is an ideal handmade craft for Halloween decoration or a thoughtful present for craft lovers.
Crochet Stitches Used
· sc = single crochet
· inc = 2sc in same stitch (increase)
· dec = single crochet decrease
· dc = double crochet
· sl = slip stitch
· blo = work in back loops only
· flo = work in front loops only
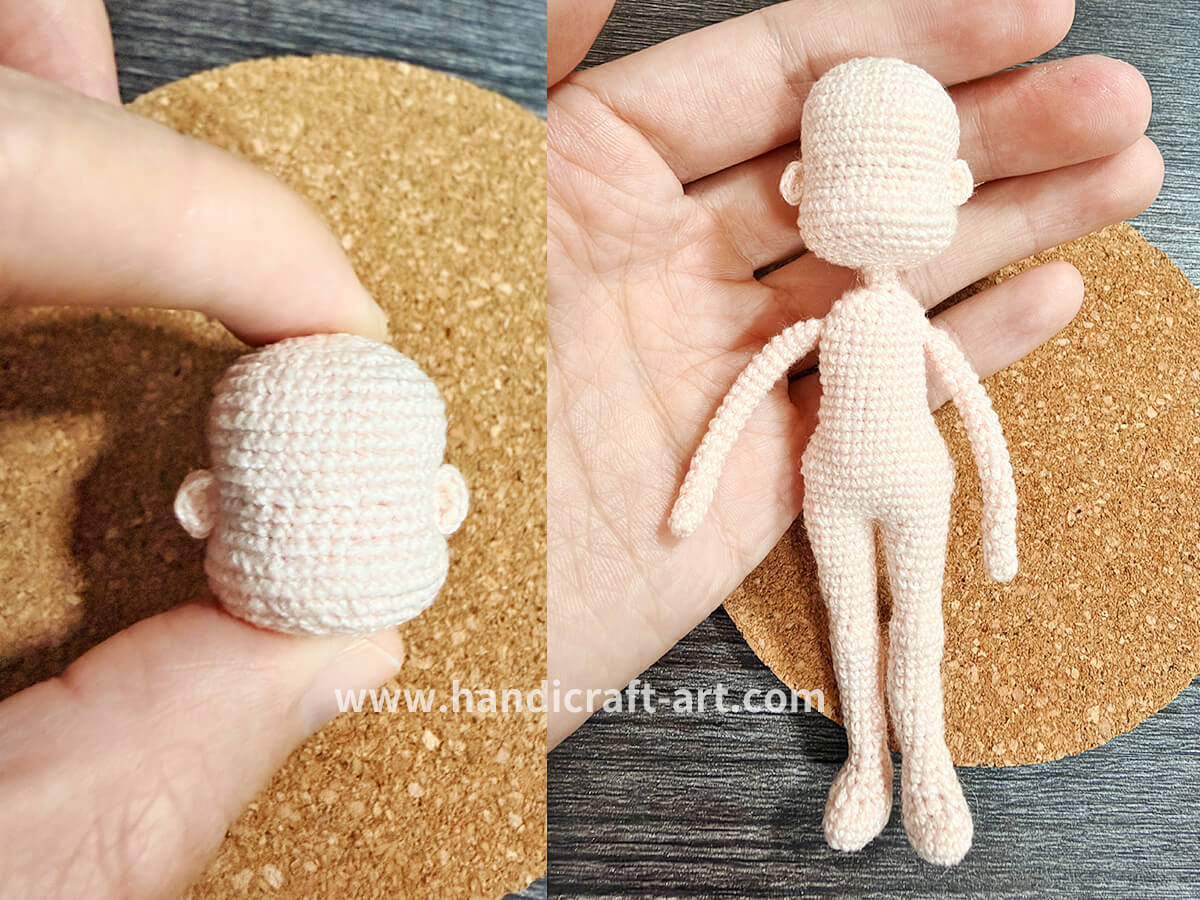
Doll Base Crochet
① Doll Head
R1:Magic Ring 6sc
R2:6inc
R3:6 (sc, inc)
R4:6 (sc, inc, sc)
R5:6 (3sc, inc)
R6:6 (2sc, inc, 2sc)
R7:6 (5sc, inc)
R8:6 (3sc, inc, 3sc)
R9~R10:48sc
R11:4 (5sc, dec, 5sc)
R12~R13:44sc
R14:16sc, 2 (dec, sc),2 (sc, dec), 16sc
R15~R16:40sc
R17:12sc, 4 (inc, sc), 4 (sc, inc), 12sc
R18~R19:48sc
R20:12sc, 4 (dec, sc), 4 (sc, dec), 12sc
R21:5 (3sc, dec, 3sc)
R22:5 (5sc, dec)
R23:10 (sc, dec)
R24:10 sc
R25:blo 10sc
R26:10dc
Use tweezers to tuck R25 and R26 inside the head when finished.
② Doll Arms *2
R1~R20:6sc
③ Doll ears *2
Magic Ring 5T
④ Doll Legs *2
R1:6ch, Start crocheting from the second-to-last stitch.
4sc, 3 sc in same stitch, 4sc
R2:2inc, 2sc, 3inc, 2sc, 2inc
R3~R4:18sc
R5:5sc, 4dec, 5sc
R6:5sc, 2dec, 5sc
R7:dec, 2sc, 2dec, 2sc, dec
R8:8sc
R9:inc, 7sc
R10:9sc
R11:inc, 8sc
R12:10sc
R13:sc, inc, 8sc
R14:sc, inc, 9sc
R15~16:12sc
R17:sc, dec, 9sc
R18:sc, dec, 2sc, 2inc, 4sc(Place 2inc at the knee; adjust it to the middle of the leg as needed.)
R19:12sc
R20:sc, inc, 2sc, 2dec, 4sc(Position 2dec opposite the knee; adjust as needed.)
R21:11sc
R22:sc, inc, 9sc
R23:12sc
R24:sc, inc, 10sc
R25:13sc
R26:sc, inc, 11sc
R27:14sc
R28:2sc, inc, 11sc
R29:15sc
⑤ Doll body
Join the two legs with 2 ch; choose a suitable position for joining.
R1:15sc, 2sc, 15sc, 2sc
R2~R3:34sc
R4:4sc, inc ,16sc, inc, 12sc (Place the two increases at the sides of the waist.)
R5:36sc
R6:1 dec on each waist side
R7:2 decs on each waist side
R8:30sc
R9:2 decs on each waist side
R10:1 dec on each waist side
R11~R17:24sc
R18R1:15sc, 2sc, 15sc, 2sc
R2~R3:34sc
R4:4sc, inc ,16sc, inc, 12sc (Place the two increases at the sides of the waist.)
R5:36sc
R6:1 dec on each waist side
R7:2 decs on each waist side
R8:30sc
R9:2 decs on each waist side
R10:1 dec on each waist side
R11~R17:24sc
R18:4sc, Join hand to body: 3sc, 9sc; join the other hand: 3sc, 5sc.
R19:24sc
R20:6 (2sc, dec)
R21:6 (sc, dec)
R22:6dec
Cut a piece of wire and place it in the neck, then continue crocheting.
R23~32:6sc
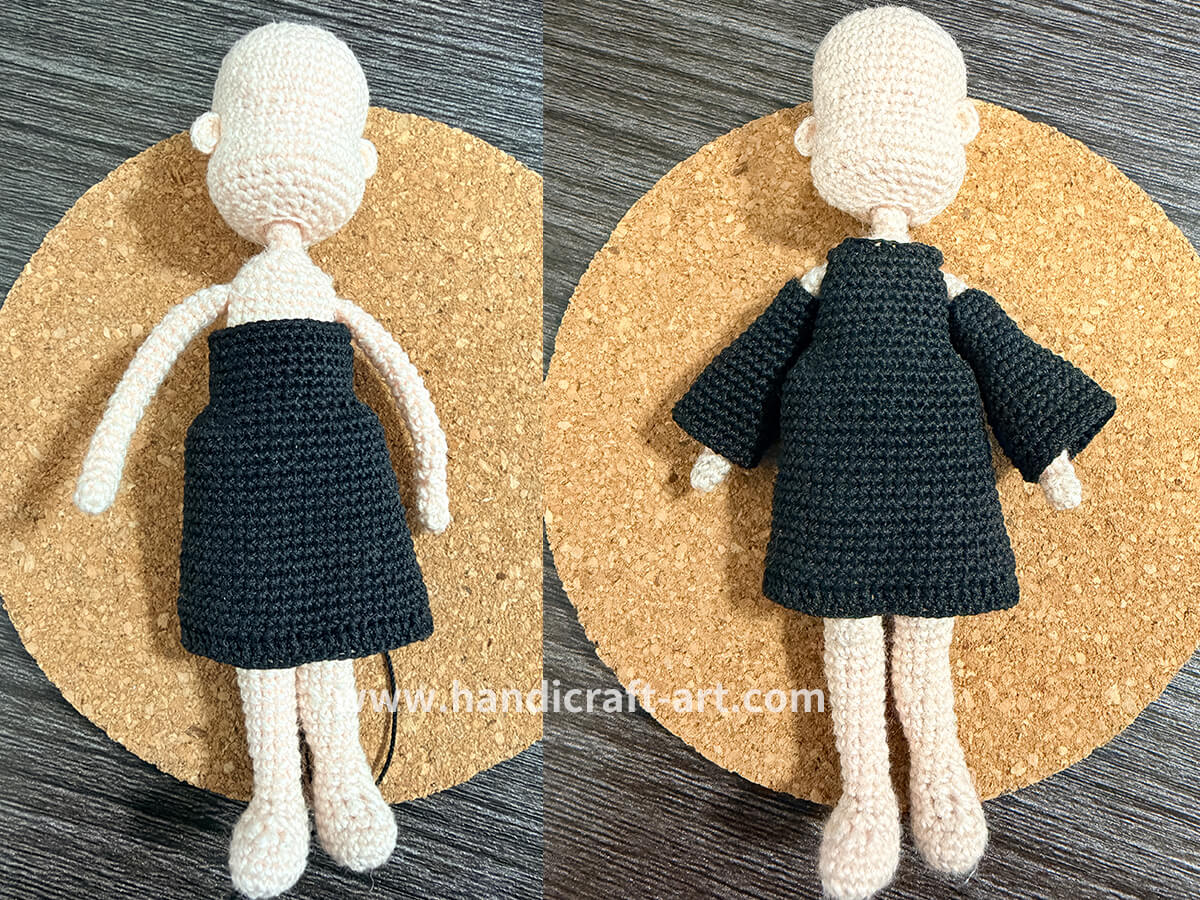
Doll Clothes Crochet
① Skirt Crochet
R1:Make 53 ch, join to form a ring.
R2:53 sc
R3:flo: dec, 51sc
R4~R6:52sc
R7:dec, 48sc, dec
R8~R10:50sc
R11:dec, 46sc, dec
R12~R14:48sc
R15:dec, 44sc, dec
R16~R18:46sc
R19:10sc, 4dec, 10sc, 4dec, 10sc
R20:10sc, 2dec, 10sc, 2dec, 10sc
R21~R26:34sc
R27:4sc, 7ch, Skip 7 stitches, 12sc, Skip 7 stitches, 7ch, 4sc
R28:11sc, dec, 8sc, dec, 11sc
R29:4sc, 12dec, 4sc
② Crochet the Sleeves*2
R1:Make 14 ch, join to form a ring.
R2~R6:14sc
R7:2inc, 10sc, 2inc
R8:18sc
R9:2inc, 14sc, 2inc
R10~R16:22sc
Doll Hair Crochet
R1:Magic Ring 8sc
R2:8inc
R3:blo: change white yarn 8 (sc, inc)
R4:
Make 8 strips: 58ch, work 56 treble crochets starting in the 3rd ch from hook.
Make 8 strips: 12ch, work 10 treble crochets starting in the 3rd ch from hook.
Make 8 strips: 58ch, work 56 treble crochets starting in the 3rd ch from hook.
R5:
Work into the outer half loops of R3.
Make 6 strips: 60ch, work 58 treble crochets starting in the 3rd ch from hook.
Make 2 strips: 14ch, work 12 treble crochets starting in the 3rd ch from hook.
Make 2 strips: 20ch, work 18 treble crochets starting in the 3rd ch from hook.
Make 6 strips: 60ch, work 28 treble crochets starting in the 3rd ch from hook.
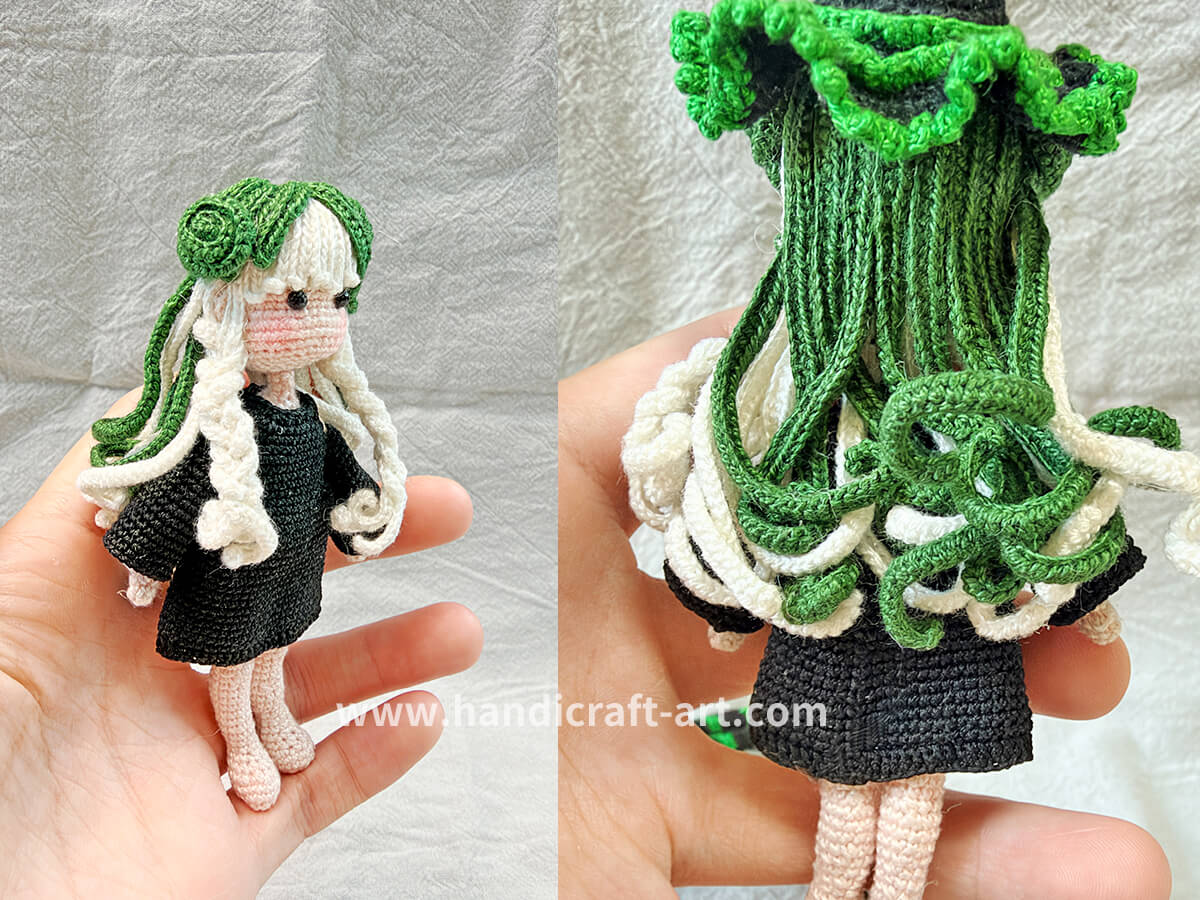
The hair section has been slightly styled, so everyone can DIY their hairstyle according to their own preferences.
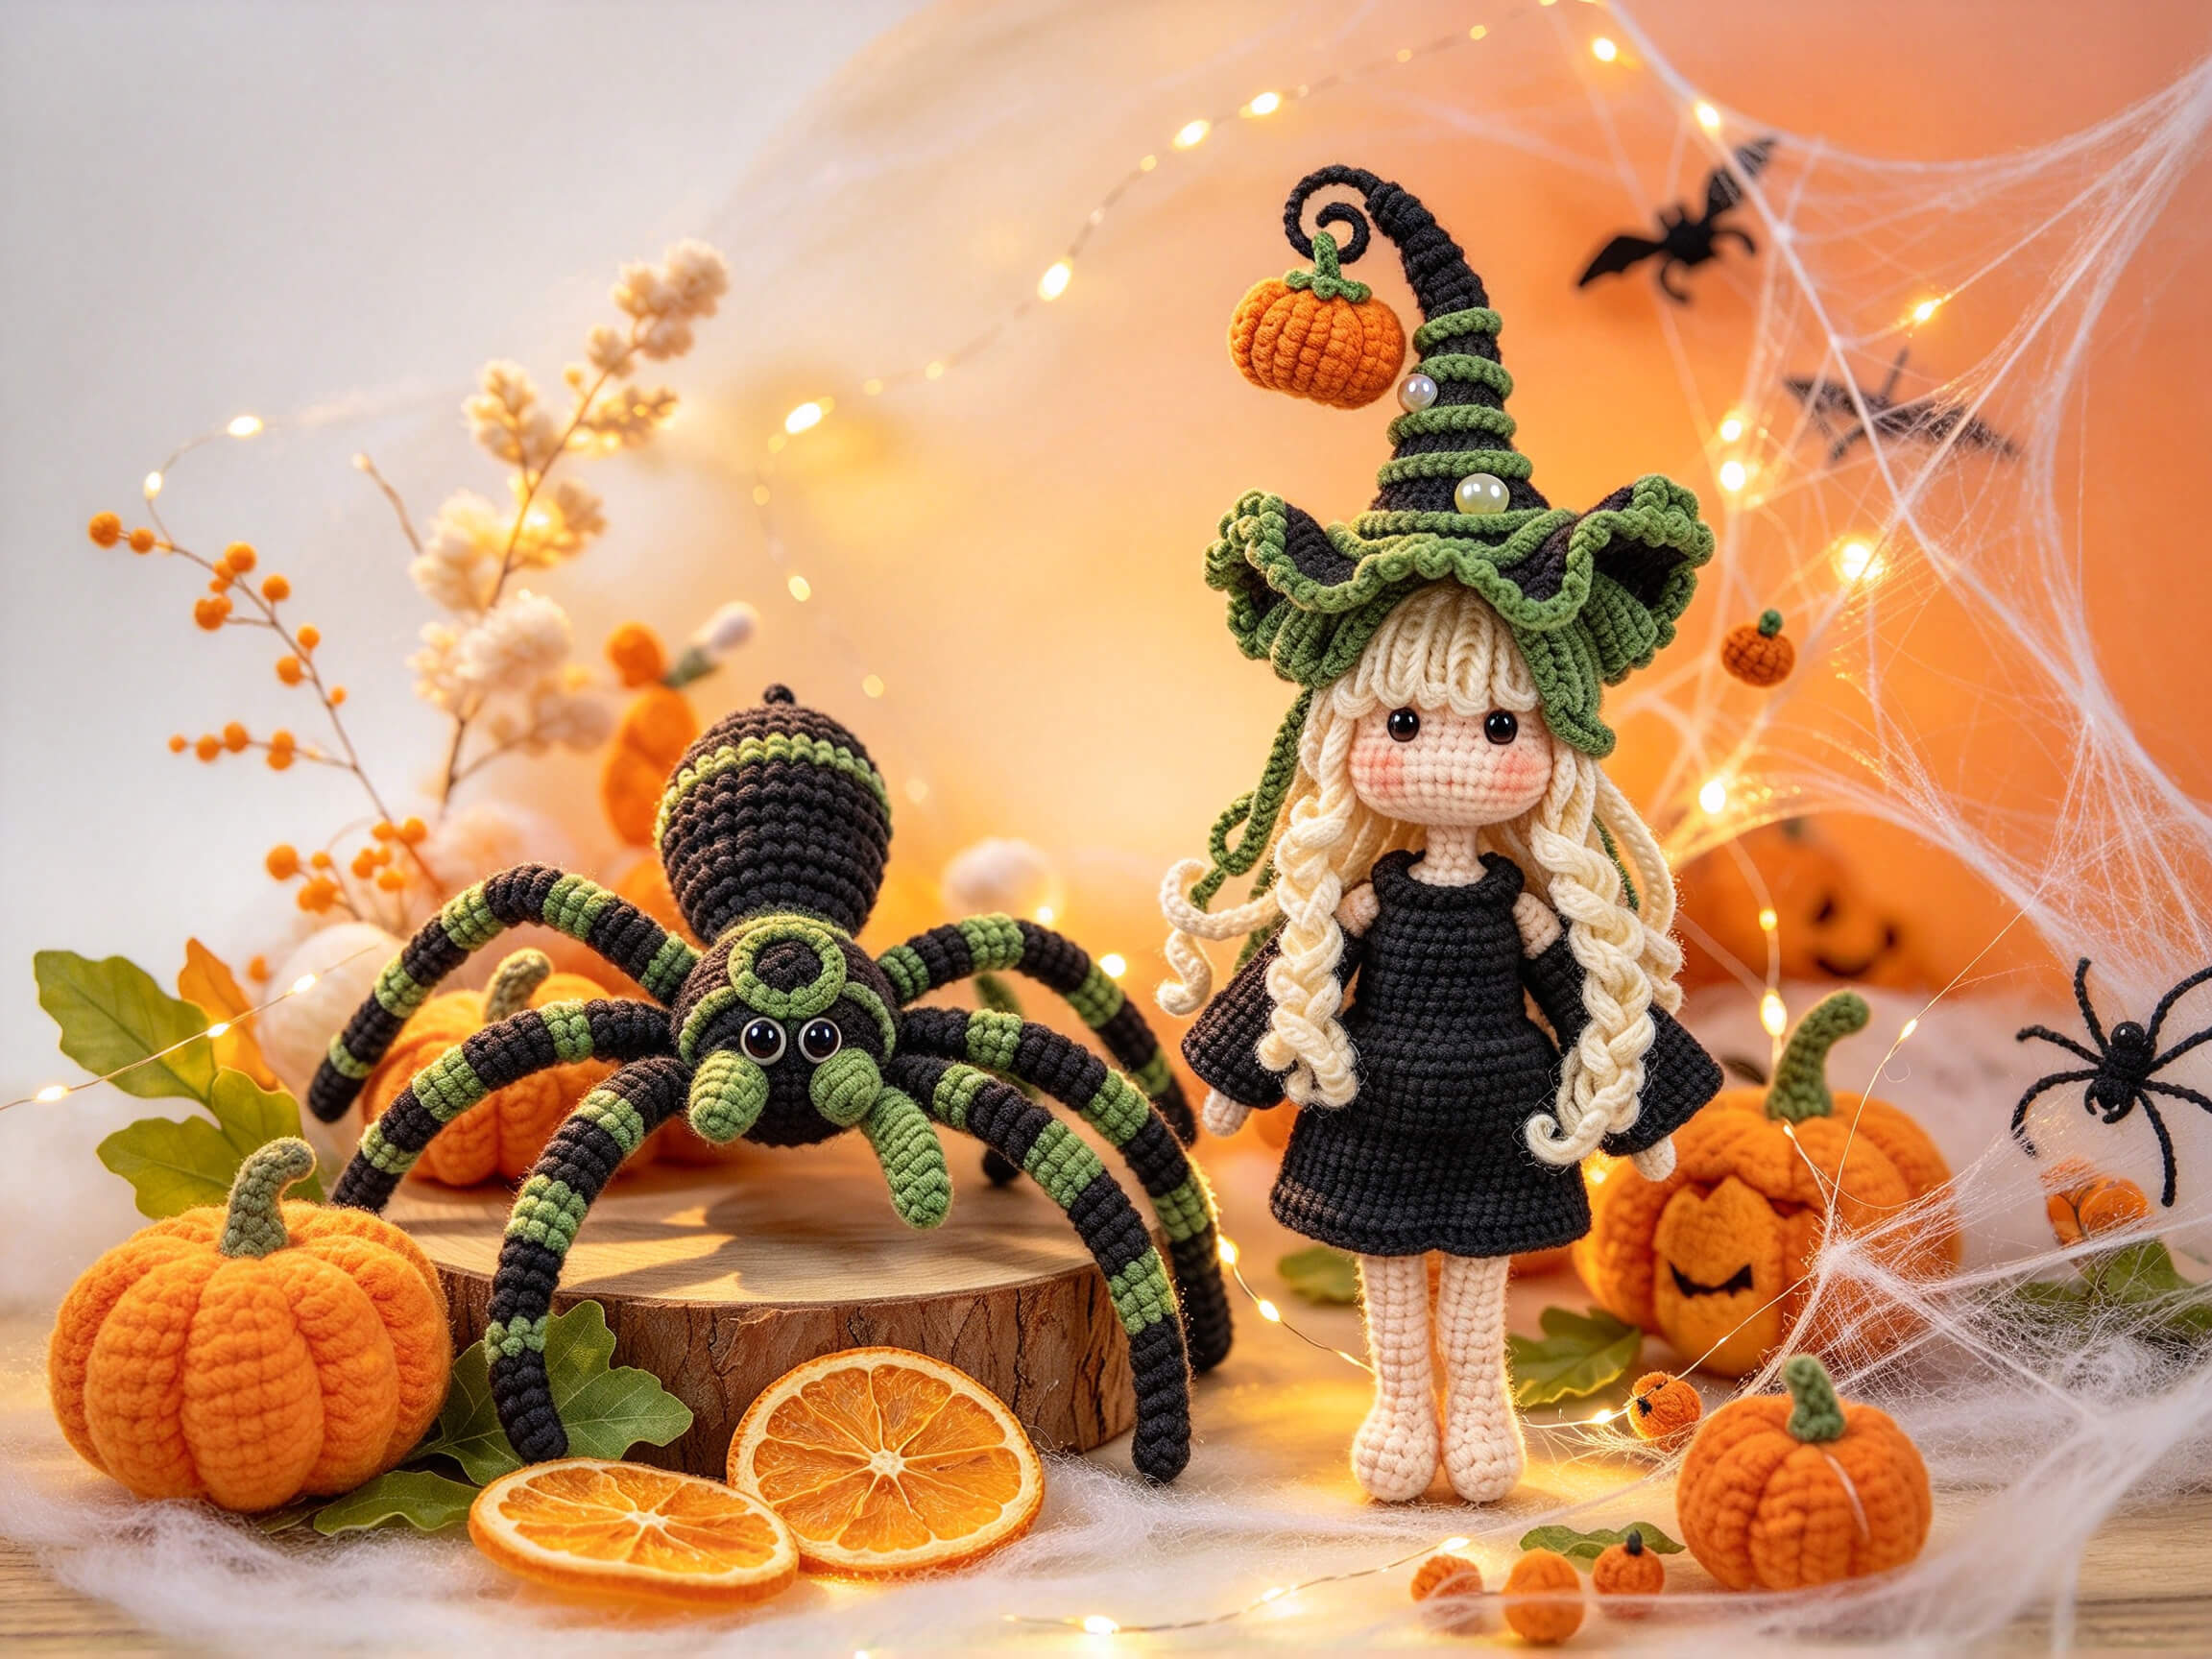
Crochet pattern for the spider in the picture:
https://www.handicraft-art.com/how-to-crochet-a-spider/
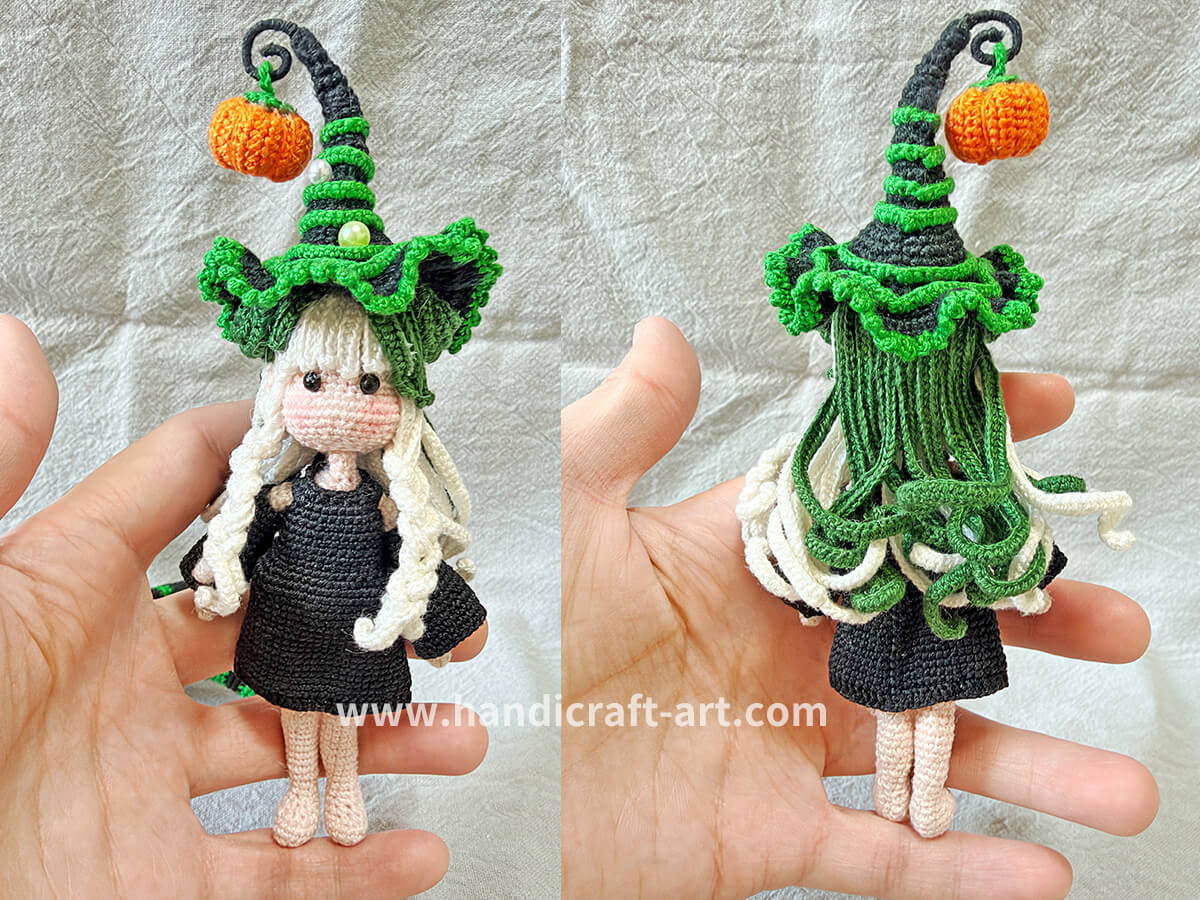
Crochet pattern for the witch hat in the picture:
https://www.handicraft-art.com/crochet-witch-hat-with-pumpkin-decoration/